Attribute Guide
This guide explains how to set the simple_return product attribute. This attribute
must be set and enabled for each product of an order, as required for RMA eligibility.
Note
Simple Returns is an order-based RMA extension, meaning an RMA request is not specific to any single item, but the order as a whole. If you need itemized and/or partial returns capabilities, please check out our premium RMA extension, Simple Returns Pro. It provides all of the features of Simple Returns with several added features like itemized and partial returns, RMA archives, and lockable RMAs to prevent customers from editing, just to name a few.
Table of Contents
Prerequisites
Before starting, please make sure you have completed the following steps:
Attribute
Step One: Add Attribute
To start, navigate to Catalog > Products and click on a product you would like to make returnable.
Attention
For configurable products, you will need to complete this step for both the configurable product, as well as the associated simple product.
From the product edit page, click Add Attribute in the top right corner of the page.

From the attributes grid, select the checkbox for simple_return and click Add Selected.
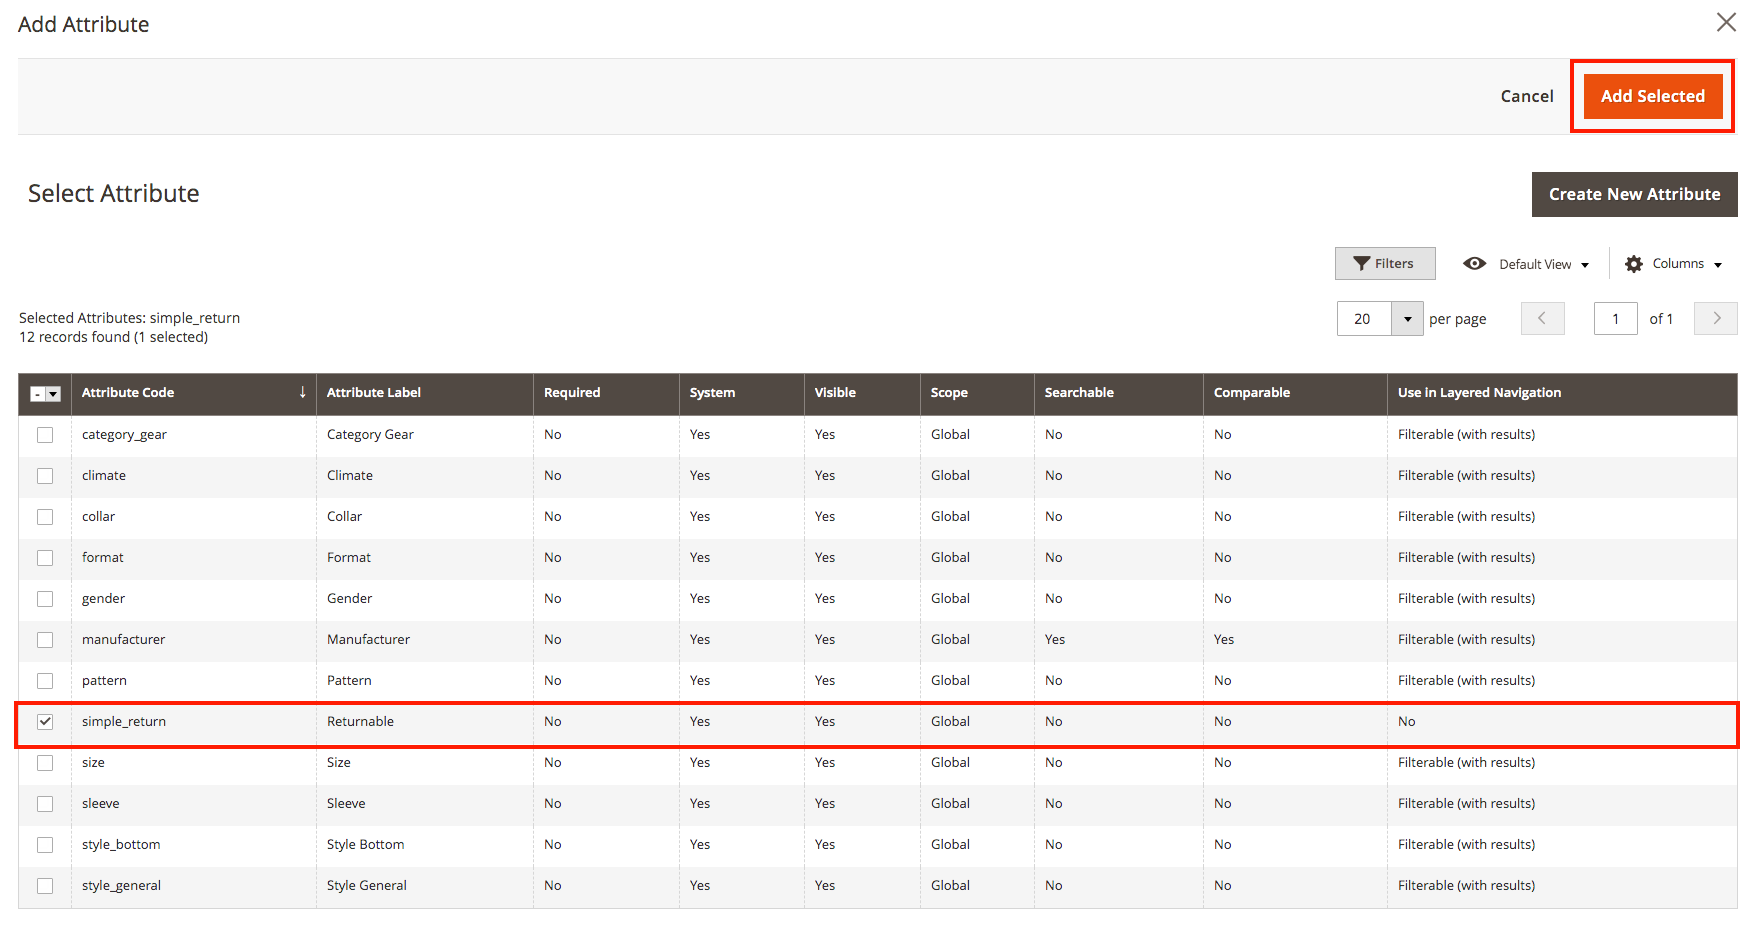
Click Save to update the product.
Step Two: Reindex Products
The next step is to reindex the products and their attributes. From the Magento root directory, run the following command:
bin/magento cache:clean && bin/magento indexer:reindex
Step Three: Update Attribute
Once the indexer is finished, navigate back to the product edit page and look for the Attributes section near the bottom of the page. Toggle open the Attributes section and click the Returnable attribute button to enable returns for the product.

Click Save to update the product. You should be able to see the attribute value set to enabled after the product is finished saving.
Warning
If the attribute value is not updated after saving the product, the likely causes are:
You did not complete Step Two: Reindex Products
The product was not successfully reindexed with the new attribute
Once you’ve verified the attribute value is saving properly, you can either manually update each product you would like to make returnable, or you can perform a bulk import to save time, particularly if you’re working with a large catalog. As of right now, we do not have a formalized guide on bulk importing.
Step Four: Test an order [Optional]
This step is optional, but we recommend completing it to get an understanding of how Simple Returns works on the frontend.
To start this step, create a new order of all returnable products. There are plenty of guides on creating test orders in Magento, so we will leave that part up to you.
Attention
Please don’t use an existing order, as the order items of an existing order will not have the required attribute saved on it.
Once you have your test order submitted, navigate to the Orders and Returns page on the frontend.

On the Orders and Returns page, fill out the relevant order information. The Order ID field should be the nine digit order increment ID value, which was generated when the order was created.

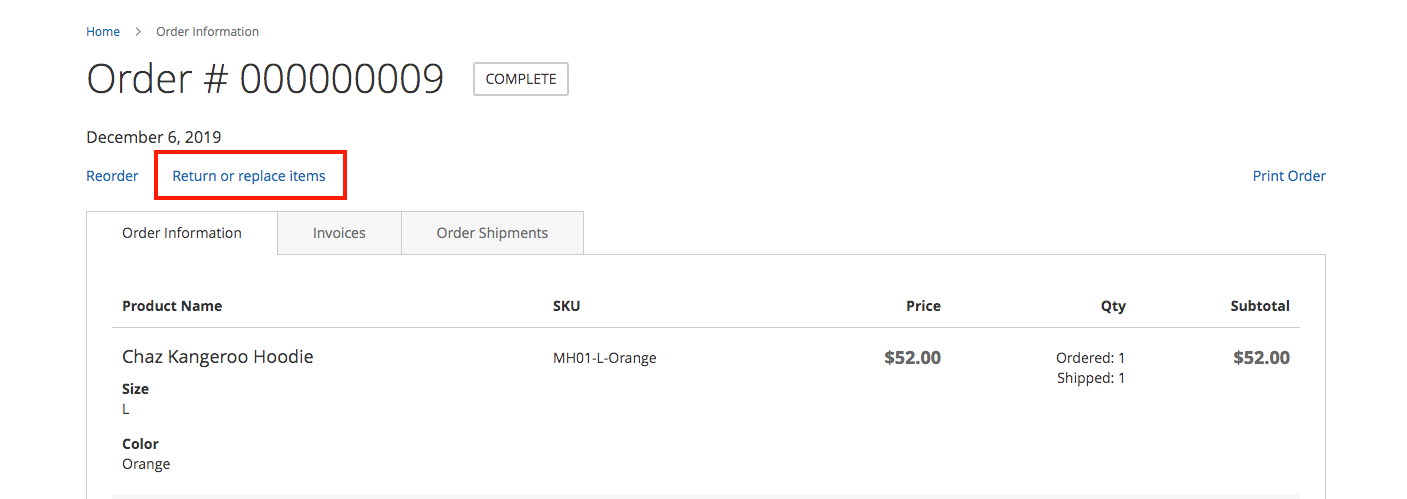
Click Continue to submit the form. This will take you to the frontend order view page.
Once the order view page has loaded, you should see a new link next to the Reorder link. It will display something to the effect of Return or replace items. Click the link, which will take you to the frontend RMA create page.
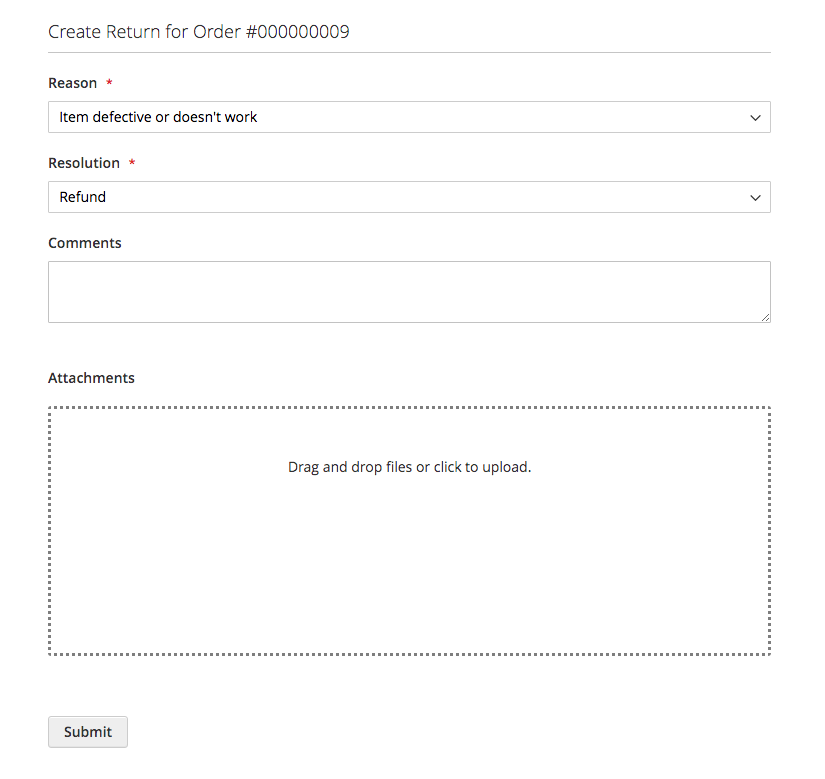
On the Create new RMA page, fill out the relevant information about the RMA request and click Submit.
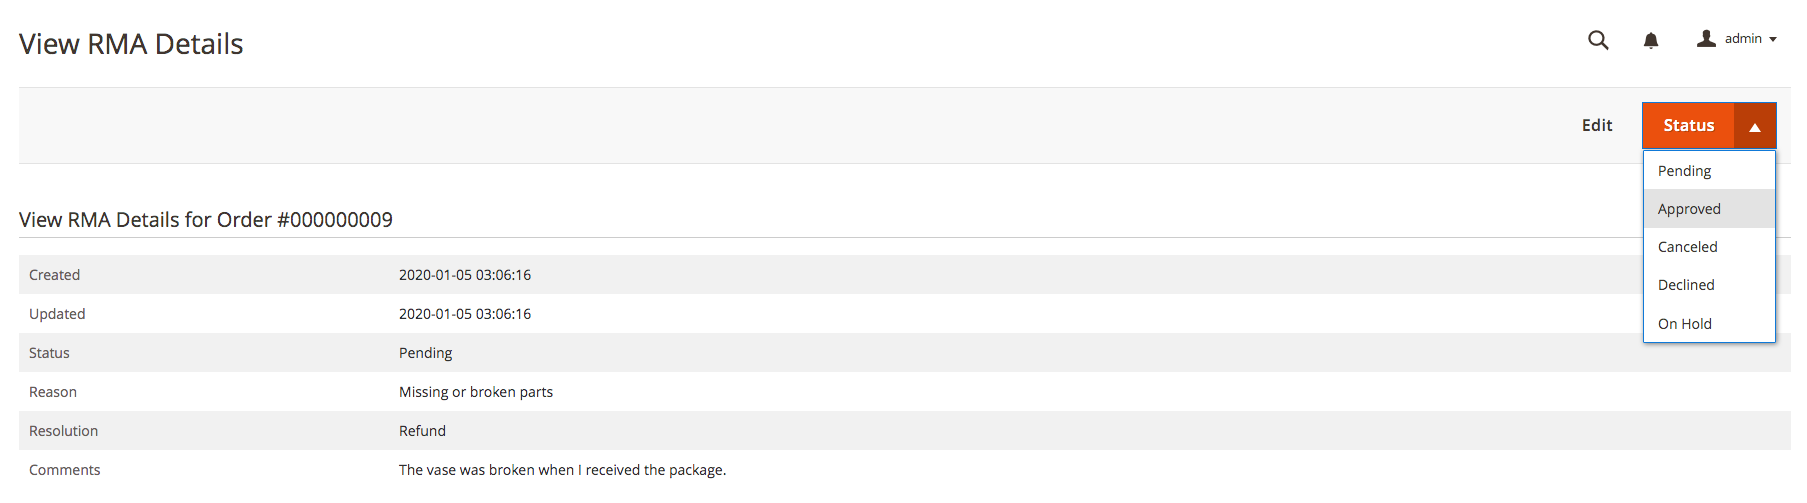
Once the RMA view page had loaded, review the information. You will not be able to generate a shipping label until the RMA request is approved.
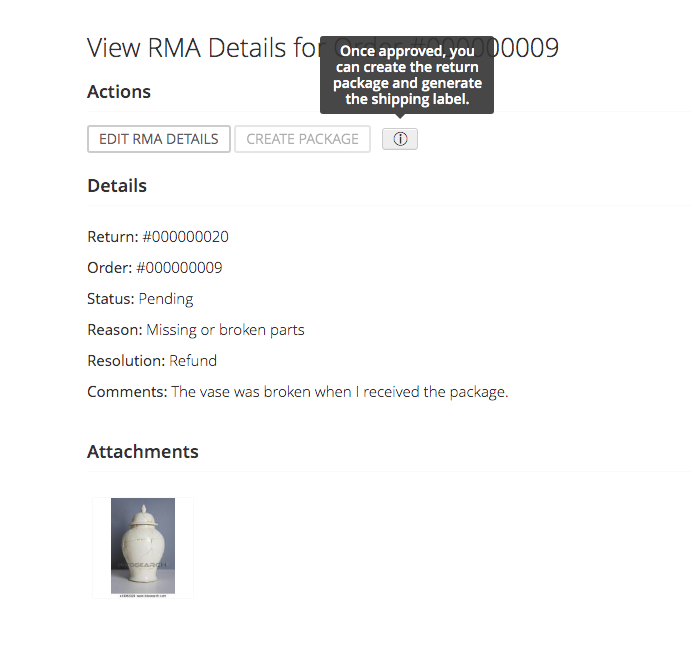
Keeping the RMA view page open, create a new tab in your browser. In the new tab, navigate to the Magento backend and approve the RMA request. This will allow you to generate the package and subsequent shipping label from the frontend like a customer.
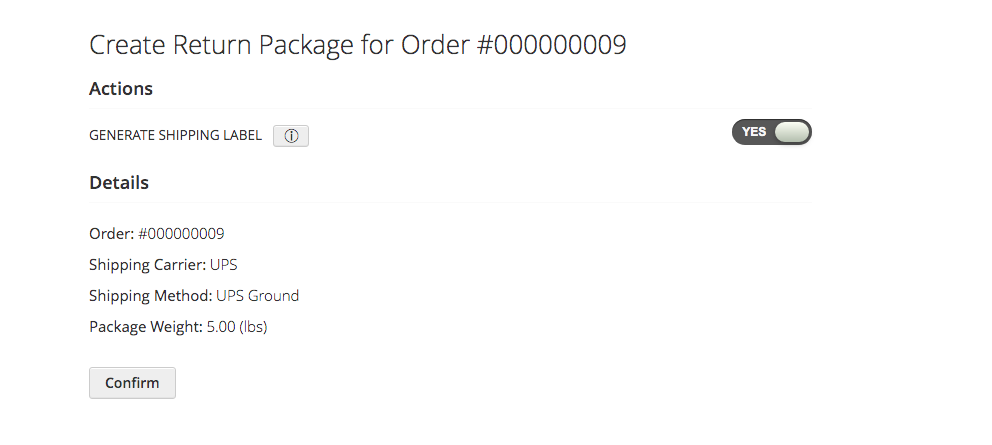
Returning to the frontend RMA view page, reload the page and click the Create Package button. This will take you to the Package create page and require you to confirm the package information. Keep the option to Generate Shipping Label set to Yes and click Confirm.
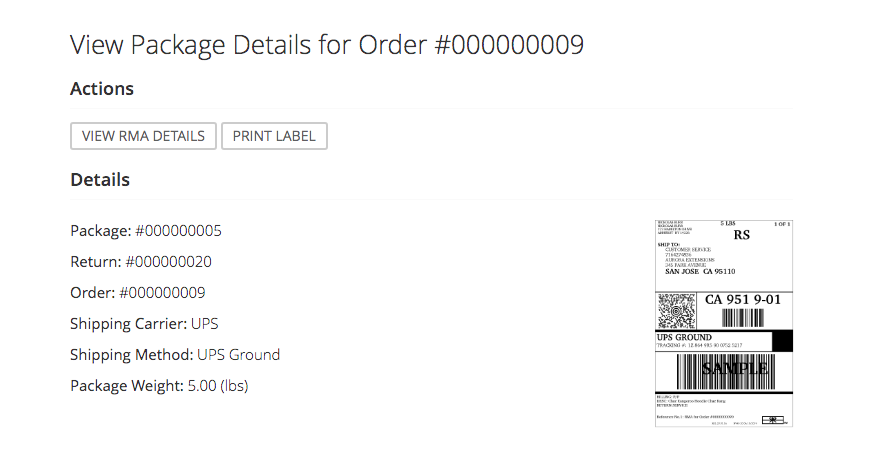
Once the Package view page has loaded, you should see all of the package details along with the newly generated shipping label.
Warning
If you encounter issues when confirming the package information, it is almost always an issue communicating with the shipping carrier APIs. Please make sure you have properly configured the desired shipping carrier, your access credentials are working, and the desired shipping carrier is selected within the Simple Returns configuration settings.